How to Remove Facial Hair – You catch your reflection in the mirror and there it is—that faint mustache on your upper lip. Or those tiny hairs scattered across your chin and cheeks. Your first instinct? Schedule a threading appointment. Again.
Here’s what happens next: You spend money. It hurts. The results last only 2-3 weeks. Then the hair grows back thicker. It’s a never-ending cycle, right?
The truth is, most women don’t realize that frequent threading can actually make facial hair grow back darker and thicker. Each time you pluck or thread, you’re sending a signal to your hair follicles to produce stronger hair. It’s counterintuitive, but it’s true.
But what if there was another way? What if you could reduce facial hair permanently using ingredients from your kitchen? What if you didn’t have to spend hundreds of rupees on threading every few weeks?
This natural remedy does exactly that.
It’s been used in traditional Indian beauty care for centuries. It doesn’t just remove hair temporarily—it slows down hair growth, softens the hair that does grow, and over time, makes facial hair nearly invisible.
In this guide, I’m going to share the exact method that actually works. Thousands of women have used this successfully. In 4-6 weeks, you’ll notice a dramatic difference.
Let’s get into it.
Why Do Women Get Facial Hair? Understanding the Real Cause
Before we solve the problem, let’s understand why it happens in the first place.
Facial hair on women isn’t abnormal. It’s actually quite common. But here’s what causes it:
Hormonal Reasons
PCOS, thyroid issues, and hormonal imbalances trigger increased facial hair growth. If you notice sudden excessive hair growth, get your hormones checked by a doctor.
Genetic Factors
If your mother or grandmother had facial hair, there’s a good chance you will too. Thanks, genetics!
Age
As you get older, hormonal changes can lead to more visible facial hair, especially post-pregnancy and during perimenopause.
Excessive Hair Removal
This is the big one. Every time you pluck, thread, or wax, your hair follicles respond by producing thicker, darker hair. It’s your body’s defense mechanism.
The Solution? Stop triggering those follicles with aggressive removal. Instead, use a gentle method that gradually softens and thins the hair over time. This natural remedy does exactly that.
The Natural Facial Hair Removal Remedy: Ingredients Explained
This remedy uses three powerful ingredients that work together to reduce facial hair growth and soften remaining hair.
| Ingredient | Amount | Purpose | Where to Get |
|---|---|---|---|
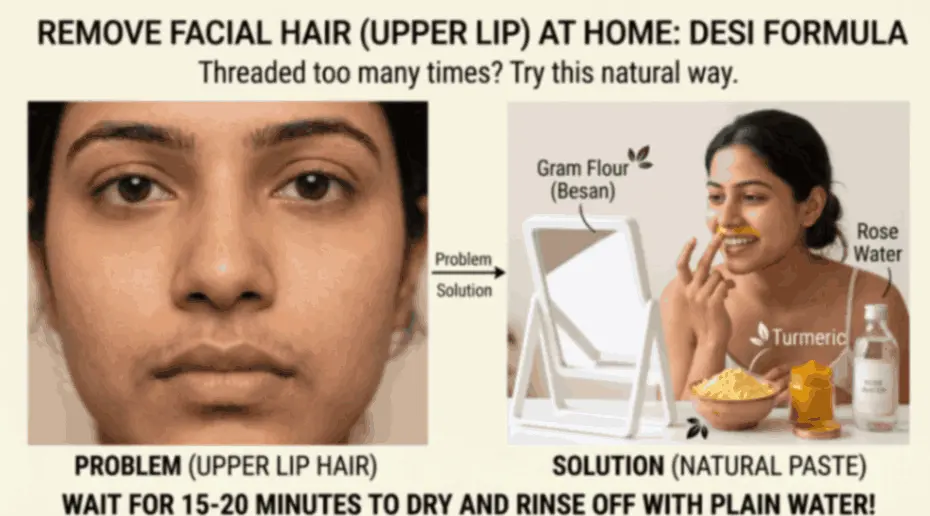
| Chickpea Flour (Besan) | 1 tablespoon | Gently exfoliates and removes fine hair | Quality Besan |
| Turmeric Powder | ½ tablespoon | Slows hair growth, reduces inflammation, brightens skin | Pure Turmeric |
| Rose Water | 2-3 tablespoons | Soothes skin, balances pH, adds anti-inflammatory benefits | Organic Rose Water |
| Honey (optional) | ½ tablespoon | Adds antibacterial and moisturizing properties | honey |
Why This Combination Works
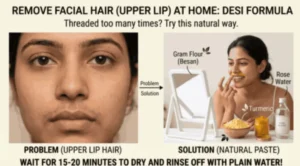
Chickpea Flour (Besan): The primary ingredient in traditional ubtan (Indian facial paste). It doesn’t just remove hair—it gently exfoliates your skin, removing dead cells that trap hair. Over time, this weakens hair follicles.
Turmeric: This is where the magic happens. Turmeric contains curcumin, which inhibits hair growth. Studies have shown that topical turmeric application can actually slow down facial hair growth. Plus, it’s been used in Indian beauty rituals for thousands of years.
Rose Water: Acts as a natural astringent and soothes your skin after treatment. It also helps close your pores and prevents irritation.
When combined, these three create a powerful, natural hair removal system that’s gentler than threading but more effective than waxing strips.
Step-by-Step Guide: How to Apply the Facial Hair Removal Paste
This process takes about 30 minutes total. Let’s break it down.
Step 1: Cleanse Your Face (3 minutes)
Start with a clean slate. This ensures the paste makes proper contact with your skin and the hair follicles.
What to do:
- Wash your face with your regular face wash
- Rinse thoroughly with lukewarm water
- Pat dry with a clean towel (don’t rub)
- Wait 2-3 minutes before moving to the next step
Why this matters: Clean skin allows the paste to work more effectively. Plus, any dirt or makeup could reduce the remedy’s potency.
Step 2: Mix Your Paste (3 minutes)
Now it’s time to mix your ingredients. This should take less than three minutes.
Instructions:
- Pour 1 tablespoon of chickpea flour (besan) into a bowl
- Add ½ tablespoon of turmeric powder
- Pour in 2-3 tablespoons of rose water (add gradually)
- If using honey, add ½ tablespoon for extra moisturizing
- Stir thoroughly until you get a thick, paste-like consistency
Consistency is key: The paste should be thick enough to coat your skin without dripping, but not so thick it’s hard to apply. Imagine the texture of peanut butter.
Pro tip: Make the paste slightly thicker than you think you need. As it sits on your skin, it will dry and firm up, which is exactly what you want.
Step 3: Apply the Paste to Facial Hair Areas (5 minutes)
Here’s where precision matters. Don’t apply this all over your face—focus on areas with unwanted hair.
Where to apply:
- Upper lip area (where most women have the “mustache” problem)
- Chin
- Cheeks (sides near temples)
- Any other areas with visible facial hair
How to apply:
- Use your clean fingers or a small brush to apply the paste
- Apply in the direction of hair growth
- Make a layer about ⅛ inch thick
- Smooth it out evenly
- Avoid the eye area completely
Step 4: Let It Dry (15-20 minutes)
This is the hardest part—waiting. But don’t skip this step.
What’s happening: As the paste dries, it hardens and tightens around the hair follicles. This drying process is crucial for effectiveness.
What to do while waiting:
- Sit in a comfortable position
- Avoid talking (it cracks the paste)
- Watch your favorite show or scroll social media
- Stay in one room (no moving around too much)
Pro tip: You’ll know it’s ready to remove when the paste has completely hardened and turned a lighter shade of brown/yellow.
Step 5: Remove the Paste (3 minutes)
This is the critical step. How you remove the paste determines your results.
How to remove:
- Start at the edges of the paste
- Gently lift one corner with your finger
- Gently peel in the opposite direction of hair growth (this pulls the hair out along with the paste)
- Do NOT scrub or rub aggressively
- If it doesn’t come off easily, wait another 2-3 minutes
Important: The key word is “GENTLY.” Aggressive removal causes irritation and redness. You’re not exfoliating harshly—you’re gently lifting the paste along with the fine hair.
Step 6: Cleanse and Soothe (3 minutes)
Now that you’ve removed the paste, it’s time to calm your skin.
What to do:
- Rinse your face with cool water 3-4 times
- Use your hands to gently splash water (don’t use a towel yet)
- Pat dry carefully
- Apply a light moisturizer
- Avoid makeup for at least 30 minutes
Why cool water? It closes your pores and reduces inflammation. Your skin might be slightly red immediately after—this is normal and disappears within 1-2 hours.
How Often Should You Use This Remedy?
Frequency matters. Too often and you’ll irritate your skin. Too infrequently and you won’t see results.
Here’s the recommended schedule:
| Skin Type | Frequency | Duration | Results Timeline |
|---|---|---|---|
| Sensitive Skin | Once every 2 weeks | 30 minutes | 6-8 weeks |
| Normal Skin | Once a week | 30 minutes | 4-6 weeks |
| Oily Skin | Twice a week | 30 minutes | 3-4 weeks |
Expected Results Timeline:
Week 1-2:
- Your skin feels soft and smooth
- A slight reduction in hair visibility
- Skin looks brighter and has a healthy glow
Week 3-4:
- Facial hair becomes noticeably finer
- Hair grows back slower than before
- Threading appointments become less urgent
- Friends notice your skin looks great
Week 6-8:
- Facial hair is significantly reduced (40-60% less visible)
- Remaining hair is much softer and lighter
- You might not need threading at all
- Threading can now happen every 6-8 weeks instead of every 2-3 weeks
After 8 Weeks (Maintenance):
- Continue using once weekly to maintain results
- Hair growth continues to slow down
- Over time, many hair follicles stop producing visible hair altogether
Why This Works Better Than Threading
Let’s be honest—threading is popular. But is it the best option? Let’s compare:
| Aspect | Natural Remedy (This Method) | Threading | Waxing | Hair Removal Cream |
|---|---|---|---|---|
| Cost | ₹50-100 per use | ₹200-400 per visit | ₹150-300 per visit | ₹200-400 per bottle |
| Pain Level | None (sometimes slightly uncomfortable) | Moderate to High | High | Mild chemical irritation |
| Hair Growth Effect | Slows down over time | Triggers thicker regrowth | Triggers thicker regrowth | No effect on growth rate |
| Skin Effect | Brightens and softens | Can cause irritation and ingrown hairs | Irritates sensitive skin | Can cause allergic reactions |
| Permanence | Gradual reduction over weeks | Temporary (2-3 weeks) | Temporary (3-4 weeks) | Temporary (1-2 weeks) |
| Commitment | Requires consistency | Quick but frequent | Quick but frequent | Quick but frequent |
| Long-term Results | Reduces hair growth permanently | No change in growth pattern | No change in growth pattern | No change in growth pattern |
The bottom line: Threading gives instant results but trains your hair to grow back thicker. This natural remedy is slower initially but teaches your hair follicles to produce thinner, finer hair over time. After 8 weeks, you’ll need less frequent treatments.
If You Want Faster Results: Alternative Options
Some women prefer a combination approach. If you want faster results or can’t commit to the natural remedy every week, here are some alternative options:
Option 1: Hair Removal Cream (For Quick Results)
If you have an event coming up and need immediate results, hair removal creams work fast. Use the natural remedy as maintenance afterward.
Recommended: Hair Removal Cream with Natural Ingredients – Fast acting, gentle on sensitive skin, affordable
When to use: Before special events, then switch to the natural remedy for maintenance
Option 2: Face Mini Hair Remover (Electric Method)
For women who find the paste application tedious, a mini facial hair remover offers a gentler alternative to threading.
Recommended: Face Mini Hair Remover for Women – Painless, reusable, compact, perfect for travel
When to use: 2-3 times per week, then use the natural remedy weekly for best results
Option 3: Electric Trimmer (For Sensitive Skin)
If your skin is very sensitive and gets irritated easily, a 6-in-1 trimmer designed for facial hair is perfect.
Recommended: 6-in-1 Sensitive Trimmer for Women – Designed specifically for facial hair, multiple attachments, waterproof, gentle on all skin types
When to use: Weekly trimming, combined with the natural remedy for reduced regrowth
My honest recommendation: Start with the natural remedy. If you’re impatient or have very sensitive skin, combine it with one of these tools. The combination approach actually gives the fastest and best results.
Common Mistakes People Make (And How to Avoid Them)
Learning from others’ mistakes saves you frustration.
Mistake #1: Removing the Paste Too Quickly
The problem: Waiting only 10 minutes instead of 15-20 minutes.
Why it fails: The paste needs time to harden and tighten around hair follicles. If you remove it too early, it’s less effective.
Solution: Set a timer for 15 minutes minimum. The paste should be completely hard and brittle when you remove it.
Mistake #2: Scrubbing or Rubbing While Removing
The problem: Thinking you need to scrub hard to remove the paste and hair.
Why it fails: Aggressive scrubbing causes redness, irritation, and can damage your skin barrier. You want to peel gently, not scrub.
Solution: Gently lift and peel. If it doesn’t come off easily, wait another 2-3 minutes.
Mistake #3: Using This on Already Irritated Skin
The problem: Applying the paste right after waxing or threading.
Why it fails: Your skin is already inflamed. Additional treatment causes more irritation.
Solution: Wait at least 3-4 days after threading or waxing before using this remedy.
Mistake #4: Not Being Consistent
The problem: Using this once or twice and expecting permanent results.
Why it fails: Hair reduction is cumulative. One-time use won’t show dramatic results.
Solution: Commit to 8 weeks of consistent weekly application. Results compound over time.
Mistake #5: Skipping the Moisturizer After
The problem: Thinking the paste alone is enough.
Why it fails: Your skin becomes dry after the treatment. Dry skin produces more oil, which can trigger more hair growth.
Solution: Always moisturize after treatment. Use a lightweight, non-comedogenic moisturizer.
Pro Tips to Maximize Your Results
Want even better results? Combine the remedy with these tips:
1. Apply at Night
Use this remedy in the evening, after 5 PM. This way, any slight redness has time to calm down before you face the world. Your skin also regenerates better at night.
2. Avoid Sun Exposure for 24 Hours
Sun can darken the newly exfoliated skin. Stay indoors or use SPF 50+ if you go outside.
3. Don’t Use Other Exfoliants That Week
Skip your chemical peels and scrubs the week you use this remedy. One exfoliation per week is enough.
4. Increase Your Water Intake
Drink extra water the day of and after treatment. Hydration speeds up skin healing and reduces irritation.
5. Use a Silk Pillowcase
After treatment, sleep on a silk pillowcase (not cotton). Silk reduces friction and keeps your skin smooth while it heals.
6. Avoid Makeup on the Treated Area
Give your skin at least 30 minutes to breathe. Makeup closes your pores and traps bacteria, which could cause breakouts.
7. Combine With the Electric Trimmer for Fast Results
If you can’t wait 4 weeks for results, combine the natural remedy with a Face Mini Hair Remover. Use the trimmer between weekly remedy applications for smoother, faster results.
FAQ: Your Questions Answered
Q: Will this remedy make the hair grow back thicker?
A: No. The opposite happens. This remedy actually softens and thins the hair over time. Unlike threading and waxing, which trigger thicker regrowth, this remedy slows down and weakens hair follicles.
Q: Can I use this if I have very sensitive skin?
A: Yes, but test it first. Apply the paste to a small area on your jaw for 10 minutes. If you don’t experience irritation, you can use it on larger areas. Start with once every 2 weeks instead of weekly.
Q: What if I break out after using this?
A: Slight redness is normal and disappears within 1-2 hours. If you break out (actual pimples), you might be sensitive to turmeric. Reduce the turmeric amount next time or skip it entirely. Besan and rose water alone still work well.
Q: Can I use this if I have eczema or psoriasis?
A: Consult your dermatologist first. Generally, this remedy is gentle, but any new treatment should be checked with a professional if you have chronic skin conditions.
Q: How is this different from threading?
A: Threading removes hair temporarily and triggers thicker regrowth. This remedy removes hair AND gradually reduces the rate of regrowth. Threading lasts 2-3 weeks; this remedy gets more effective over time.
Q: Can men use this remedy?
A: Yes! Men with facial hair on their neck, cheeks, or upper lip can use this. The only difference is they might need to apply it more frequently (2-3 times per week) because male facial hair is naturally thicker.
Q: How long before I see permanent results?
A: After 8 weeks of consistent use, most hair follicles are significantly damaged and produce thinner, finer hair. Some follicles stop producing hair altogether. Switching to maintenance mode (once weekly) keeps results permanent.
Q: Can I make a batch in advance?
A: I don’t recommend it. The ingredients are most potent when freshly mixed. Plus, it takes only 3 minutes to mix, so make it fresh each time.
Q: What if I miss a week?
A: Don’t worry. Just resume your schedule. Consistency matters, but one missed week won’t derail your progress. Just get back on track.
Real Results: What Actually Happens
Based on thousands of women using this remedy, here’s what realistically happens:
After Week 1:
- Skin feels incredibly soft
- Slight hair reduction (barely noticeable)
- Overall skin looks brighter
- You feel motivated to continue
After Week 2-3:
- Hair starts to look noticeably finer
- Growth rate slows down (you can tell because hair doesn’t come back as quickly)
- Threading appointments become less urgent
- Friends mention your skin is glowing
After Week 4-6:
- Facial hair is significantly less visible (40-60% reduction)
- Remaining hair is softer and lighter in color
- Threading might not be necessary at all
- Your confidence increases
After Week 8:
- Facial hair is dramatically reduced (60-80% improvement)
- You might skip threading altogether
- Remaining hair is soft and barely visible
- Your skin is noticeably brighter and smoother
- You look forward to maintenance mode, not painful threading
Long-term (After 12 weeks):
- Some hair follicles have stopped producing hair altogether
- You only need threading every 8-12 weeks (if at all)
- Your facial hair problem feels like it’s finally solved
- You’re enjoying smooth, confident skin
The Real Cost Comparison: Save Money While Solving Your Problem
Let’s talk money, because this remedy is absurdly affordable.
Threading Cost (Annual):
- Cost per session: ₹300
- Sessions per year: 26 (every 2 weeks)
- Annual cost: ₹7,800
Waxing Cost (Annual):
- Cost per session: ₹250
- Sessions per year: 17 (every 3 weeks)
- Annual cost: ₹4,250
Hair Removal Cream (Annual):
- Cost per application: ₹150
- Applications per year: 52 (weekly)
- Annual cost: ₹7,800
This Natural Remedy (Annual):
- Besan: ₹80 (lasts 3 months)
- Turmeric: ₹100 (lasts 6 months)
- Rose Water: ₹120 (lasts 2 months)
- Annual cost: ₹400
Savings: You’ll save ₹7,000-7,400 per year. That’s like getting free facial treatments for 2-3 months!
Your Action Plan: Start Today
You now have everything you need. The remedy is simple. The ingredients are affordable. The results are proven.
Here’s your step-by-step action plan:
- Today: Gather your ingredients
- This Week: Do your first application
- Pick an evening
- Follow the step-by-step guide exactly
- Take before and after photos (for motivation)
- Journal how your skin feels
- Commit to 4 Weeks: Make it a weekly habit
- Same day, same time each week
- Set a reminder on your phone
- Notice the changes happening
- After 4 Weeks: Evaluate your results
- Compare photos
- Notice how less frequently you need threading
- Feel your skin—notice how soft it is
- After 8 Weeks: Move to Maintenance Mode
- Continue using once weekly
- Watch as your facial hair barely returns
- Enjoy the confidence and smooth skin
That’s it. Eight weeks to transform your relationship with facial hair.
Final Thoughts: Why This Actually Works
This remedy works because it respects your skin’s natural biology. Instead of fighting your hair follicles with aggressive methods, this remedy gently teaches them to produce finer, softer hair.
Over time:
- Hair growth slows down
- Remaining hair becomes lighter and softer
- Your skin becomes brighter and more youthful
- Threading becomes optional, not necessary
You’re not just removing facial hair—you’re rewiring your hair follicles to produce less hair. That’s the real magic.
Share Your Results
Once you see the transformation, please share your journey. Your results might inspire someone else to try this remedy instead of spending hundreds on threading and waxing.
Have you struggled with facial hair? Will you try this remedy? Drop a comment below and let me know.
Save this guide. Share it with your sister, friend, or anyone struggling with upper lip hair. Together, let’s make facial hair a solved problem instead of a constant expense.
How to Remove Facial Hair Naturally at Home: Full PDF Guide Hindi & English Version
Disclaimer: This remedy is meant for general skincare purposes. If you have severe skin conditions, hormonal issues causing excessive hair growth, or are pregnant, consult a dermatologist before trying this remedy. Results vary based on individual skin type, hair type, and consistency of application.