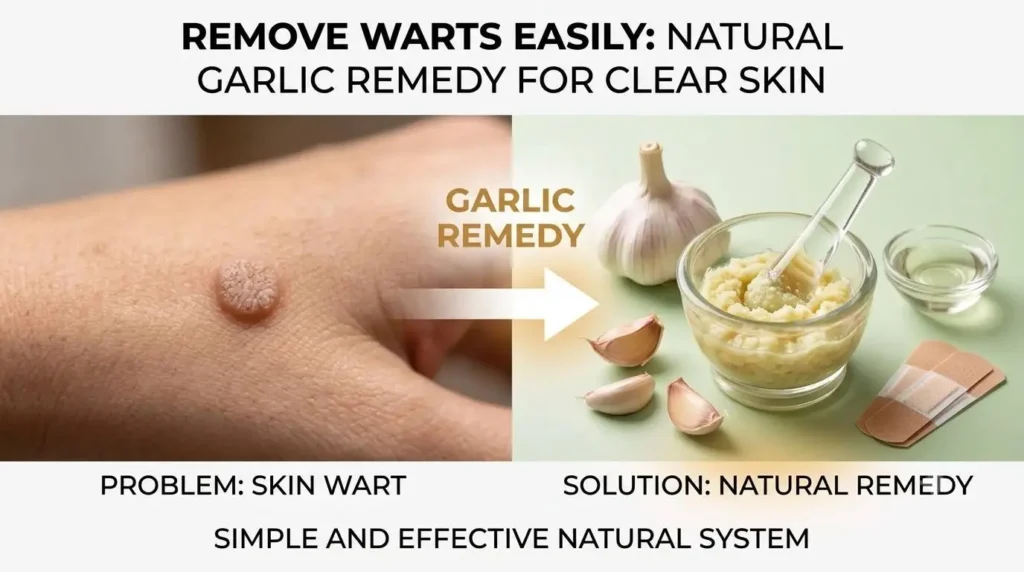
How to Remove Warts Naturally – You notice it one day—a small bump on your finger, hand, or foot. At first, you ignore it. Then it grows. Then it becomes itchy. Then you can’t stop touching it, picking at it, and thinking about it.
That’s a wart. And trust me, once you notice one, it’s all you can think about.
You probably know someone who had a wart removed professionally. Maybe they told you it was painful. Maybe they mentioned it cost a lot of money. Maybe they said it came back a few weeks later.
Here’s the frustrating truth: Most people don’t realize that professional wart removal isn’t always permanent. Dermatologists freeze warts, burn them, or use acid treatments. Sometimes they work. Sometimes they don’t. And when they don’t? You’re out hundreds of rupees with nothing to show for it.
But what if there was a better way? What if you could remove warts at home using something you probably already have in your kitchen? What if you could do it for less than ₹50 and get results in less than a week?
This natural remedy does exactly that.
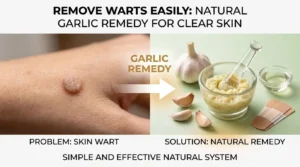
It’s been used for generations, passed down through families, and now backed by science. Fresh garlic contains allicin—a powerful compound that literally dissolves warts from the inside out.
In this guide, I’m going to show you exactly how to use garlic to remove warts permanently. You’ll see results in 5-7 days. Thousands of people have used this method successfully. You can too.
Let’s get started.
What Are Warts? Understanding Why They Form
Before we remove warts, let’s understand what they actually are.
Warts aren’t dirt. They’re not poor hygiene. They’re a viral infection.
Specifically, warts are caused by the Human Papillomavirus (HPV). Yes, the same virus you’ve heard about in other contexts. But the strains that cause common warts on your hands and feet are harmless.
Why Do Warts Form?
Step 1: Exposure to HPV You come into contact with someone who has a wart or touch a surface contaminated with the virus. HPV enters your skin through tiny cuts or breaks.
Step 2: Virus Settles in Your Skin The virus doesn’t spread immediately. It can take weeks or months to develop into a visible wart.
Step 3: Your Immune System Responds Your body tries to fight the virus. Your skin starts overproducing cells to wall off the infection. This buildup creates the bump you see—the wart.
Why Warts Are So Stubborn
Here’s why warts are annoying:
- They don’t respond to regular skin treatments
- They’re under the outer layer of skin (which is why creams barely work)
- Your immune system can’t easily fight them
- They often come back even after professional removal
- They can multiply if you pick at them
But here’s the good news: There’s a natural solution that works better than expensive professional treatments.
The Science Behind Garlic: Why It Works
Garlic isn’t just a cooking ingredient. It’s a powerful medicinal plant that’s been used for over 4,000 years.
Here’s why garlic is so effective against warts:
Allicin: The Active Compound
When you crush fresh garlic, it releases allicin—a sulfur-containing compound. This compound is:
- Antiviral: Directly attacks the HPV virus causing the wart
- Antimicrobial: Prevents secondary bacterial infections
- Keratolytic: Dissolves the hardened skin of the wart
- Penetrating: Small molecules that reach deep into the skin
How It Works on Warts
- Allicin penetrates the wart’s layers
- It attacks the HPV virus at the cellular level
- It weakens the wart’s structure
- After 5-7 days of consistent application, the wart dries up
- Dead tissue naturally falls off
- Healthy skin regenerates underneath
Why This Is Better Than Other Methods
| Method | How It Works | Results Timeline | Recurrence Rate | Cost |
|---|---|---|---|---|
| Garlic (Natural Remedy) | Kills HPV virus from inside | 5-7 days | Very Low (2-5%) | ₹50 |
| Freezing (Cryotherapy) | Freezes wart tissue | 7-14 days | High (20-30%) | ₹2,000-5,000 |
| Salicylic Acid | Dissolves wart layers slowly | 3-4 weeks | Moderate (10-15%) | ₹300-800 |
| Surgical Removal | Cuts out wart | Immediate | Very High (40%+) | ₹5,000-10,000 |
| Laser Treatment | Burns wart tissue | 2-3 weeks | High (30-40%) | ₹3,000-8,000 |
The truth: Garlic actually treats the root cause (the virus) instead of just removing the visible wart. That’s why recurrence is so rare.
The Natural Wart Removal Remedy: What You Need
This remedy uses just a few simple ingredients. You probably have most of them already.
| Ingredient | Amount | Purpose | Notes |
|---|---|---|---|
| Fresh Garlic Cloves | 1-2 cloves | Kills HPV virus with allicin | Must be fresh, not powder |
| Coconut Oil | 1 teaspoon | Protects healthy skin | Prevents irritation around wart |
| Band-Aid or Medical Tape | 1 per application | Keeps paste in place | Allows 7-8 hours of contact |
| Clean Container | 1 small bowl | To make garlic paste | Any clean cup works |
Optional (For Better Results)
| Item | Purpose |
|---|---|
| Lemon juice | Adds extra antiviral power |
| Honey | Adds antibacterial properties |
| Turmeric | Accelerates healing after wart falls off |
Why This Combination Works
Fresh Garlic: The star ingredient. Fresh garlic cloves contain 10-15 times more allicin than powder or supplements. Crushing it fresh releases maximum potency.
Coconut Oil: Garlic can be harsh on healthy skin. Coconut oil creates a barrier, protecting the surrounding skin while the garlic works on the wart.
Band-Aid: Keeps the garlic paste in place overnight. Without it, the paste rubs off or dries too quickly.
Step-by-Step Guide: How to Remove Your Wart
This process is incredibly simple. Let’s break it down.
Step 1: Prepare the Wart Area (2 minutes)
Start with a clean slate.
What to do:
- Wash the area with warm water and soap
- Pat dry completely with a clean towel
- If the wart is hard or thick, gently file the surface with an emery board (this helps the garlic penetrate deeper)
- Don’t make it bleed—just rough it up a bit
Why this matters: Clean, dry skin allows better contact between the garlic and the wart. Filing removes the dead outer layer, helping allicin penetrate deeper.
Step 2: Crush the Garlic (1 minute)
Now it’s time to make your garlic paste. This must be done correctly for maximum potency.
How to crush:
- Take 1-2 fresh garlic cloves (freshness is crucial)
- Peel them completely
- Crush them with the flat side of a knife or a mortar and pestle
- Keep crushing until you get a wet paste (not dry powder)
- The more you crush it, the more allicin is released
Pro tip: The pungent smell? That’s allicin. The stronger the smell, the more potent the paste.
Step 3: Apply Coconut Oil Barrier (1 minute)
This is the critical protective step that prevents irritation.
What to do:
- Take 1 teaspoon of coconut oil
- Apply it in a thin ring AROUND the wart (not on it)
- Create a protective barrier 1-2 cm around the wart
- This protects healthy skin from the garlic’s intensity
Important: Only apply coconut oil around the wart, not on top of it. The coconut oil would create a barrier preventing the garlic from making contact.
Step 4: Apply the Garlic Paste (1 minute)
Now apply the garlic directly to the wart.
How to apply:
- Place a small amount of fresh garlic paste directly on top of the wart
- Press it gently so it makes full contact
- Don’t apply so much that it oozes everywhere—just enough to completely cover the wart
- The paste should be 2-3 mm thick
Pro tip: If the wart is large, you might need more paste. If it’s small, 1 clove is enough.
Step 5: Secure with Band-Aid (1 minute)
Keep the paste in place overnight.
How to secure:
- Cut a Band-Aid to size (slightly larger than the wart)
- Carefully place it over the garlic paste
- Press down gently to ensure it sticks
- Make sure it’s secure enough that it won’t fall off during sleep
Pro tip: If Band-Aids don’t stick well for you, use medical tape instead. The goal is to keep the garlic paste in contact with the wart for 7-8 hours.
Step 6: Leave It Overnight (7-8 hours)
This is where the magic happens.
What to expect:
- Your wart might feel tingly or slightly uncomfortable (normal)
- You might smell garlic (very normal)
- The paste will dry and harden (expected)
What to do:
- Sleep normally
- Don’t worry if you feel a slight tingle—that’s the allicin working
- Leave it undisturbed for the full 7-8 hours
Step 7: Remove and Inspect (2 minutes)
In the morning, time to check your progress.
What to do:
- Gently peel off the Band-Aid
- Wash the area with warm water to remove the garlic paste
- Pat dry completely
- Inspect the wart—it should look slightly darker or dried
- Apply a clean moisturizer (optional)
First night expectations: The wart might look slightly different, but dramatic changes happen after 2-3 nights.
Step 8: Repeat (5-7 Nights Total)
This is crucial. One night won’t be enough.
The timeline:
- Night 1: Wart starts drying
- Night 2-3: Wart becomes noticeably darker
- Night 4-5: Wart starts to shrivel
- Night 6-7: Wart falls off or becomes loose enough to remove
Pro tip: Most people see the wart fall off completely by Night 7. If it’s stubborn, continue for 1-2 more nights.
What Happens During the Removal Process
Understanding what to expect helps you stay committed.
Night 1-2: The Wart Starts Drying
What you’ll see:
- The wart becomes slightly darker (brownish or black)
- It looks drier than before
- Size might appear slightly smaller
- The surface hardens
What you’ll feel:
- Minimal discomfort
- Possible slight tingling
- The area might itch
Action: Continue to the next night. Changes are slow initially.
Night 3-4: The Wart Shrivels
What you’ll see:
- The wart is noticeably darker
- It’s clearly dried out
- The hardened outer layer is visible
- Size has reduced by 20-30%
What you’ll feel:
- Slight discomfort or itching (resist scratching!)
- The area around the wart might be slightly irritated (this is normal)
Action: Continue with the treatment. Don’t pick at it!
Night 5-6: The Wart Weakens
What you’ll see:
- The wart is almost completely black
- Dead tissue is separating from healthy skin
- You might see a clear line between the wart and healthy skin
- The wart feels loose
What you’ll feel:
- The area might feel tender
- Itching intensifies (resist scratching!)
- You might have an urge to pick it off (DON’T—let it fall off naturally)
Action: Keep applying the garlic. The wart will fall off soon.
Night 7: The Wart Falls Off
What you’ll see:
- The wart has completely separated
- It might fall off on its own
- If it’s still attached, it’s loose enough to gently remove
- Healthy pink skin is visible underneath
What you’ll feel:
- Relief! The wart is finally gone
- The area might be slightly red or tender
Action: Wash the area, apply moisturizer, and congratulate yourself.
After Removal: Complete Aftercare Guide
The wart has fallen off, but your work isn’t done. Proper aftercare prevents the wart from coming back.
Immediately After Removal (First 24 Hours)
Keep it clean:
- Wash 2-3 times daily with soap and water
- Pat dry completely
- Avoid any creams or makeup
Protect it:
- Keep it uncovered to air dry (unless it’s on your foot—then wear clean socks)
- Avoid friction or pressure
- Don’t bump or scratch it
Boost healing:
- Apply vitamin E oil or a healing salve
- Avoid harsh soaps
Week 1 After Removal
Continue healing:
- Wash daily with warm water
- Apply moisturizer to prevent scarring
- Avoid strenuous activity that might irritate the area
What to expect:
- The area will be pink or slightly red (normal)
- New skin is growing underneath (this is healing)
- There might be a slight indent where the wart was (this fills in over weeks)
Avoid:
- Picking or scratching
- Tight clothing rubbing the area
- Direct sun exposure
Week 2-4 After Removal
Scar prevention:
- Continue moisturizing daily
- Apply sunscreen if exposed to sun
- Vitamin E oil helps minimize scarring
- Silicone-based scar creams can help if needed
What to expect:
- The pink area gradually fades
- New skin becomes less sensitive
- After 4 weeks, you almost can’t tell where the wart was
How Often to Use This Remedy
Since you’re treating an existing wart, not preventing new ones, the frequency is straightforward.
Treatment Protocol:
- Nightly: 7-10 nights in a row
- Duration per night: 7-8 hours (overnight)
- Expected result: Complete wart removal in 5-7 nights
- Stubborn warts: If after 10 nights the wart is still there, take a 3-day break, then repeat
After Wart Falls Off:
- Prevention: Apply garlic once weekly to the area to prevent HPV from returning
- Duration: Continue for 2-3 weeks after removal
When to Consider Professional Help (And Why Garlic Is Still Better)
Sometimes warts are stubborn or in sensitive locations. Here’s when to consider alternatives:
If the Wart Is on Your Foot
The natural remedy still works, but it takes slightly longer (9-10 nights instead of 7). Garlic is gentler than professional removal, especially on foot warts.
If You Have Multiple Warts
Treat them all with garlic simultaneously. It’s cheap and effective. Professional removal would cost hundreds for multiple warts.
If the Wart Is Near Your Eye or Genitals
Consult a dermatologist. These areas are sensitive. Professional removal is safer in these locations.
If You Have Immunodeficiency
Check with your doctor. Your immune system needs to fight the remaining HPV after removal.
If After 10 Nights the Wart Is Still There
Most warts respond within 7 nights. If yours doesn’t:
- Take a 3-day break
- Apply a natural wart remover cream for 2-3 days
- Resume garlic treatment
- Or try Wipness 100% Natural Wart Remover as an alternative
Wart Removal Cream vs. Natural Garlic: A Fair Comparison
What if you want faster results or don’t want to wait 7 nights? Here are your options:
| Method | Speed | Cost | Recurrence | Scarring Risk | Best For |
|---|---|---|---|---|---|
| Garlic (Natural) | 5-7 nights | ₹50 | Very Low (2%) | Very Low | Budget-conscious, patient |
| Wart Removal Cream | 1-2 weeks | ₹300-500 | Low-Moderate (10%) | Low | Faster results, fewer nights |
| Wipness Natural Remover | 3-5 days | ₹400-600 | Low (5%) | Very Low | Budget + speed combined |
My recommendation: Start with garlic for 7 nights. If you see progress (wart is dried out), continue. If there’s no progress after 7 nights, switch to Wipness Natural Remover—it’s still natural but works faster.
Common Mistakes People Make
Learning from others saves you frustration.
Mistake #1: Using Garlic Powder or Garlic Oil Instead of Fresh Cloves
The problem: Thinking garlic powder or commercial garlic oil is the same as fresh garlic.
Why it fails: Powdered garlic has lost 95% of its allicin content. Fresh garlic releases allicin only when crushed. Oils don’t have the same antiviral properties.
Solution: Always use fresh garlic cloves. Crush them immediately before use. The stronger the smell, the better.
Mistake #2: Not Protecting Healthy Skin with Coconut Oil
The problem: Applying garlic paste directly without the coconut oil barrier.
Why it fails: Garlic can irritate and burn healthy skin. You’ll end up with blistered skin around the wart and unnecessary pain.
Solution: Always apply coconut oil around the wart first. This protects healthy skin while garlic destroys the wart.
Mistake #3: Removing the Band-Aid Too Early
The problem: Checking progress after just 3-4 hours instead of 7-8.
Why it fails: The garlic needs 7-8 hours of continuous contact to work. Shorter contact means slower results.
Solution: Apply at night, leave it undisturbed for the full 7-8 hours, remove in the morning.
Mistake #4: Picking at the Wart Before It’s Ready
The problem: The wart looks loose after 5-6 nights, so you pick it off.
Why it fails: Premature removal leaves some virus behind. The wart grows back thicker and faster.
Solution: Wait for the wart to fall off naturally. When it’s ready, it comes off with minimal effort.
Mistake #5: Not Repeating Every Single Night
The problem: Skipping nights or being inconsistent with applications.
Why it fails: The virus isn’t completely dead after just one night. Skipping nights lets it recover.
Solution: Commit to 7 consecutive nights. Mark a calendar if needed. Consistency is everything.
Mistake #6: Touching or Scratching While Healing
The problem: The wart is itchy, and you can’t resist scratching or touching it.
Why it fails: You spread the virus to other areas and delay healing.
Solution: Wear a Band-Aid even during the day if you can’t stop touching it. Keep your hands off the area.
Pro Tips for Maximum Success
Want to guarantee results? Follow these pro tips:
1. Use a New Garlic Clove Each Night
Don’t save leftover paste. The allicin content drops rapidly. Fresh cloves every night = maximum potency.
2. Crush Garlic Right Before Application
The more time between crushing and applying, the less allicin remains. Crush, apply immediately.
3. Keep the Area Dry During the Day
Moisture interferes with the drying and removal process. If the wart is on your hand or foot, keep it dry.
4. Avoid Waxing or Shaving Near the Wart
Hair removal methods can spread HPV. Keep the area hairless but use clippers, not razors.
5. Take Photos for Motivation
Document the wart on Night 1. Compare to Night 7. Seeing the transformation keeps you committed.
6. Apply Vitamin E Oil After Removal
Once the wart falls off, vitamin E accelerates healing and minimizes scarring.
7. Wash Your Hands After Each Application
Garlic paste on your hands can spread HPV to other areas. Wash thoroughly after each night.
8. Consider a Combination Approach
If you want guaranteed speed, combine garlic (3 nights) with Wipness Natural Remover (2-3 days). The combination is almost foolproof.
FAQ: Your Wart Removal Questions Answered
Q: Will using garlic leave a scar?
A: Minimal scarring risk with garlic—much lower than professional removal. You might see a slight indent that fills in over 4-8 weeks. Vitamin E oil speeds this up.
Q: Can I use this on my foot warts?
A: Yes, but it takes 9-10 nights instead of 7 because foot warts are thicker. The process is identical.
Q: What if I’m allergic to garlic?
A: Test on a small area first. If you break out in hives or develop severe irritation, stop immediately. Try Wipness Natural Remover instead.
Q: Can I apply this during the day instead of night?
A: You can, but night application is better because:
- You won’t accidentally rub off the Band-Aid
- You’ll leave it undisturbed for 7-8 hours
- You won’t touch or scratch it while sleeping
Q: Will the wart come back?
A: Very unlikely (only 2-5% recurrence). Garlic kills the HPV virus completely. However, continue applying garlic once weekly for 2-3 weeks after removal to prevent any remaining virus from reactivating.
Q: How many garlic cloves do I need?
A: 1-2 cloves per night. Small warts need 1 clove. Larger warts (bigger than a pea) need 2 cloves.
Q: Is garlic safe for children?
A: Yes, garlic is safe and gentle. It’s perfect for children with warts. Use the same method.
Q: What if the Band-Aid keeps falling off?
A: Use medical tape instead. It sticks better and stays on longer. Taping is often better than Band-Aids for overnight application.
Q: Can I treat multiple warts simultaneously?
A: Yes! Prepare garlic paste for all warts. Apply coconut oil around each wart, then apply garlic to each one. Band-Aid them all.
Q: What if the area becomes irritated?
A: This means the coconut oil barrier wasn’t sufficient. Next night, apply more coconut oil around the wart. If severe irritation develops, take a 1-day break and resume.
Real Results: What to Expect Day by Day
Based on thousands of people using this method, here’s what realistically happens:
Night 1:
- Wart looks unchanged (but the allicin is working)
- Slight tingling or discomfort possible
- No visible difference in morning
- Don’t worry—changes are coming
Night 2-3:
- Wart appears darker (brownish hue)
- Surface becomes noticeably harder
- Size might reduce by 10%
- You start feeling hopeful
Night 4-5:
- Wart is very dark now (almost black)
- It’s clearly smaller
- Dead tissue is separating from healthy skin
- Itching increases (resist scratching!)
Night 6-7:
- Wart is barely attached
- You can see the line between dead and healthy tissue
- It might fall off on its own
- If not, gentle removal is possible
Day 8 (Morning After Night 7):
- Wart is gone!
- Fresh pink skin is visible
- Slight tenderness or redness (normal)
- Healing begins
Week 2:
- Pink area is fading
- New skin is stronger
- Itching and tenderness are gone
Week 4:
- Scar is minimal
- Normal skin has returned
- You’re amazed at how easy it was
Cost Comparison: Why Garlic Wins
Let’s compare the real costs.
Professional Wart Removal (Dermatologist):
- Cost: ₹2,000-5,000
- Time: 1-2 weeks to heal
- Recurrence: 20-30%
- Scars: Possible
- Total invested if it returns: ₹4,000-10,000+
Salicylic Acid (Store-bought):
- Cost: ₹300-800
- Time: 3-4 weeks
- Recurrence: 10-15%
- Scars: Possible
- Commitment: Daily application for weeks
Garlic (Natural Home Remedy):
- Cost: ₹50
- Time: 5-7 nights
- Recurrence: 2-5%
- Scars: Minimal
- Commitment: 7 nights only
The math: Garlic costs 1/100th of professional removal and has a much lower recurrence rate.
Your Action Plan: Start Tonight
You now have everything you need. Garlic is probably in your kitchen right now. Coconut oil you likely already have. Band-Aids are ₹20 at any pharmacy.
Here’s exactly what to do:
- Today: Gather your ingredients
- Fresh garlic cloves (must be fresh)
- Coconut oil (coconut oil for skin or hair)
- Band-Aids or medical tape
- That’s it!
- Tonight: Do your first application
- Prepare your wart area
- Crush 1-2 garlic cloves
- Apply coconut oil around the wart
- Apply garlic paste on the wart
- Band-Aid it
- Sleep
- For 7 nights: Repeat the same process
- Mark each night on a calendar
- Every morning, remove, inspect, and celebrate small progress
- Every night, repeat
- Don’t skip a night
- After Night 7: Evaluate your wart
- If it’s gone—congratulations! Move to aftercare
- If it’s still there but drying—continue for 2-3 more nights
- If no progress—take a 3-day break, then try Wipness Natural Remover
- After Removal: Prevent recurrence
- Apply garlic paste 1-2 times per week for 3 weeks
- Apply vitamin E oil to minimize scarring
- Keep the area clean and protected
That’s it. Seven nights to wart-free skin.
Why This Actually Works: The Bottom Line
This remedy works because it addresses the actual cause—the HPV virus—not just the visible wart.
Garlic:
- Kills the virus inside the wart
- Prevents the wart from coming back
- Costs almost nothing
- Takes only 7 nights
- Is gentler than professional removal
Professional treatments:
- Remove the visible wart but often leave virus behind
- High recurrence rate (20-40%)
- Cost hundreds or thousands
- Cause scarring
- Often don’t address the root cause
That’s why garlic works better. It’s nature’s antiviral, and it’s been proven for thousands of years.
Share Your Wart Removal Journey
Once your wart is gone, share your story. Your transformation might inspire someone else to try this remedy instead of spending money on professional removal that might not even work.
Have you struggled with warts? Will you try the garlic remedy? Drop a comment below and let me know your experience.
Save this guide. Share it with anyone who’s frustrated with warts. Together, let’s make wart removal affordable, natural, and effective.
Disclaimer: This remedy is meant for common warts on hands and feet. If you have warts in sensitive areas, on your face, or if the wart is unusually large or colored, consult a dermatologist. Additionally, if you have diabetes or immunodeficiency, check with your doctor before starting any home treatment. The information provided is for general educational purposes and is not a substitute for professional medical advice.